NURIA
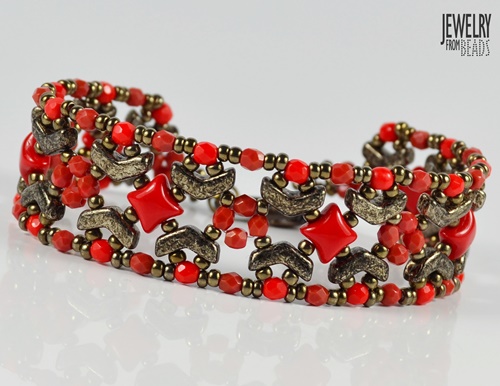

Design by Karla Mokrošová
Beading Components and Tools:
It is not necessary to have FPB in two colors, you need altogether 72 pieces.
Clasp – Lobster (14 mm) 1 piece, or Magnetics Clasp or Toggle Clasp
Beading Mat
Pliers
Scissors
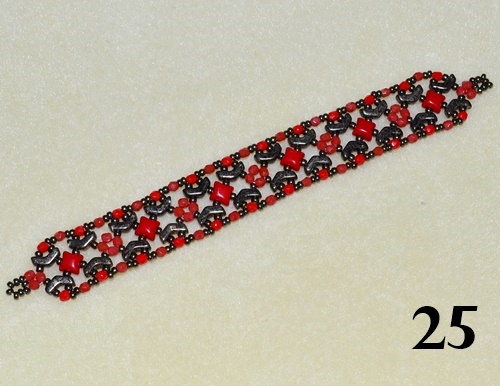
Length of the bracelet 17,8 cm (incl. clasp), width 2 cm.
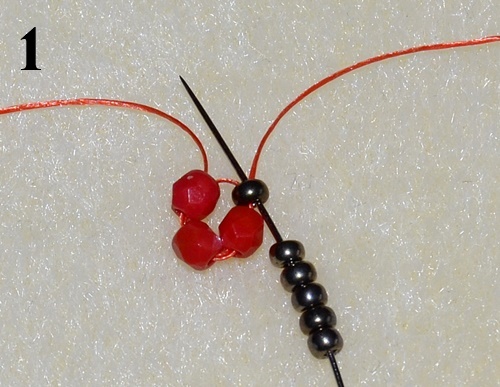
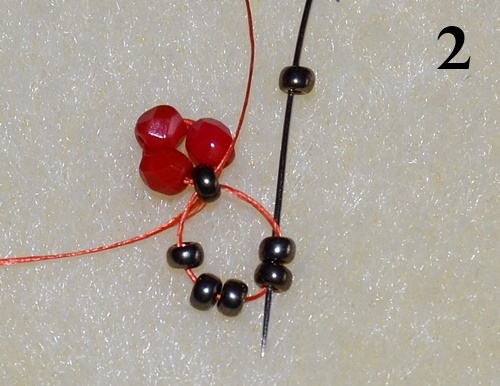
Cut the thread about 150 cm long. Leave one end of the thread ca. 15-20 cm long for weaving. Pick up 3x FPBC, 1x P and sew through into the circle. Thread exits P. You will sew a ring loop now. Pick up 5x P and sew through in the opposite direction of P (Fig. 1). Pick up 1x P and sew through the next 5x P (Fig. 2).
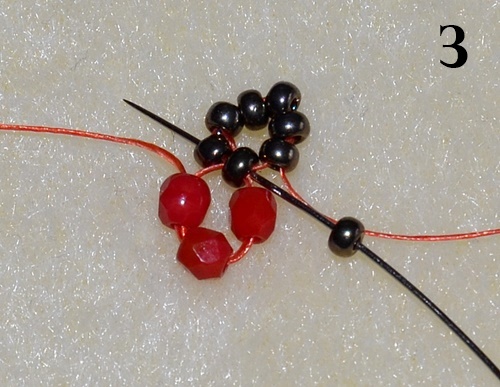
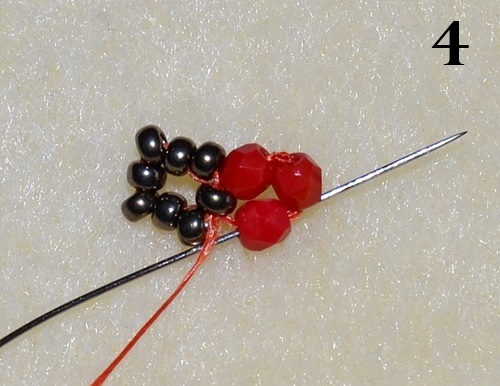
Pick up 1x P (Fig. 3) and sew through all P once again including the last P just added. After re-stitching the thread must exit the central P between FPBC. Weave the short end of the thread and cut it off. Sew through1x FPBC (Fig. 4).
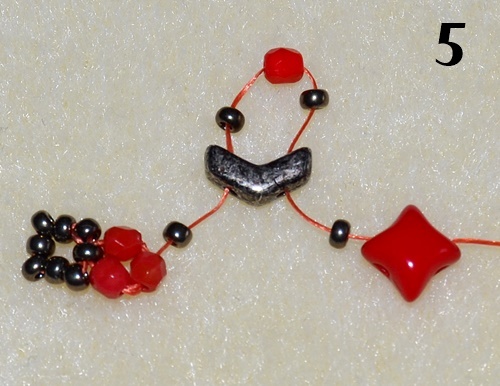
Sew through the next 1x FPBC. Pick up 1x P a 1x A through the left hole. Pick up 1x P, 1x FPBO, 1x P and sew through the right hole of A. Pick up 1x P a 1x W through the top hole (Fig. 5). Pick up 1x P a 1x A through the left hole. Pick up 1x P, 1x FPBO, 1x P and sew through the right hole of A. Pick up 1x P a 4x FPBC (Fig. 6).
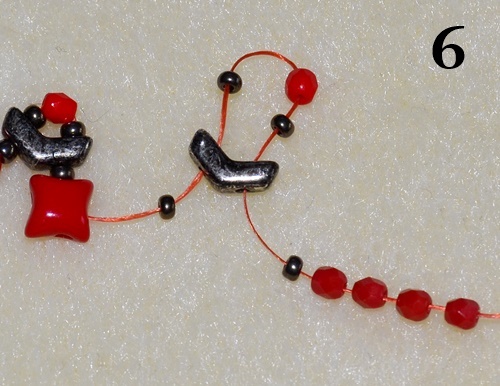
Sew through the opposite direction 1x FPBC (Fig. 7). Pick up 1x P again and repeat the procedure according to the figures 5 - 7 (Fig. 8). Continue adding 5x W and 4x FPBC between A beads – in total 6x W a 5x FPBC see Fig. 25.
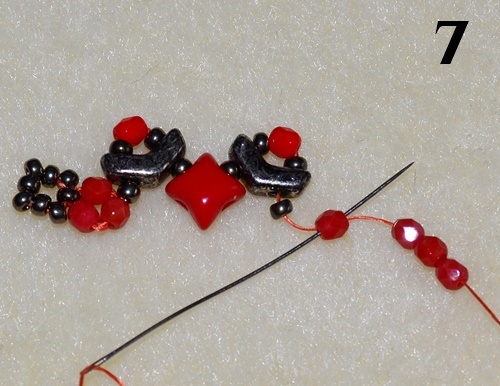
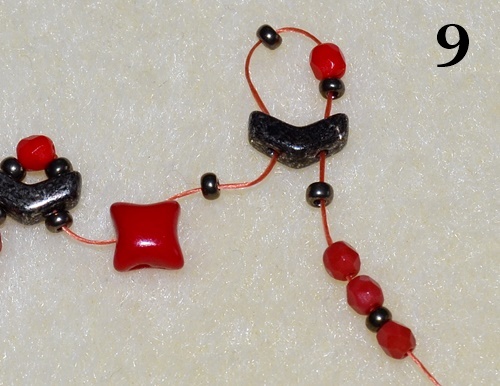
Pick up 1x P and 1x A through the left hole following last added W. Pick 1x P, 1x FPBO, 1x P and sew through the right hole. Pick up 1x P, 2x FPBC, 1x P a 1x FPBC (Fig. 9). Sew through in the opposite direction1x FPBC (Fig. 10).
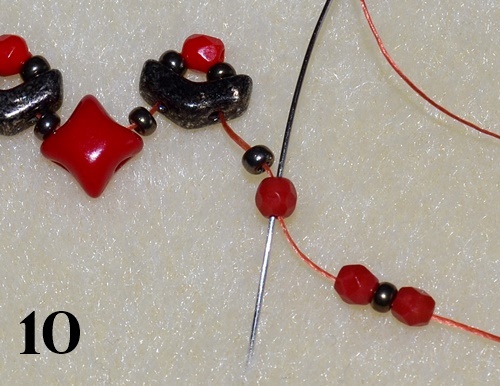
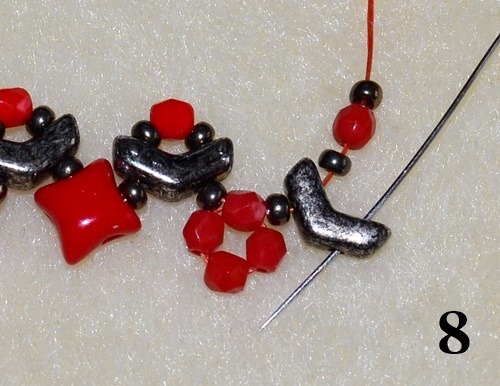
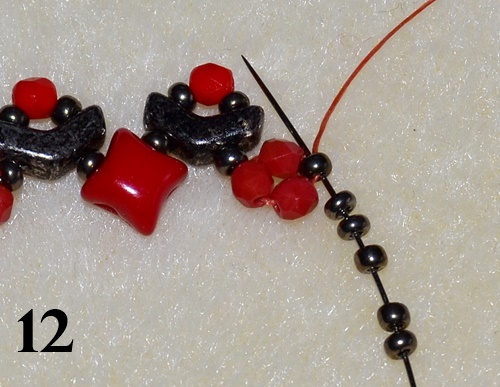
Sew through the next 1x OK a 1x P (Fig. 11). Now you will sew the second loop. Pick up 5x P and sew through the central 1x P (Fig. 12).
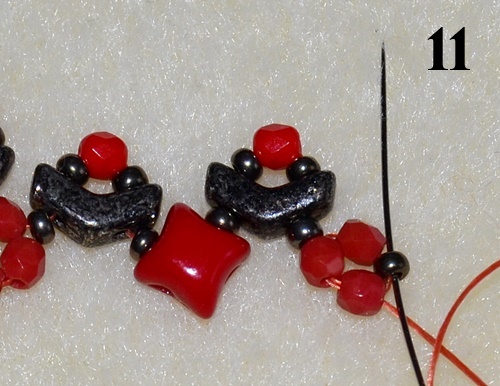
Pick up 1x P and sew the loop as shown in figures 2-3. (Fig.13). Needle exit the central 1x P(Fig. 14).
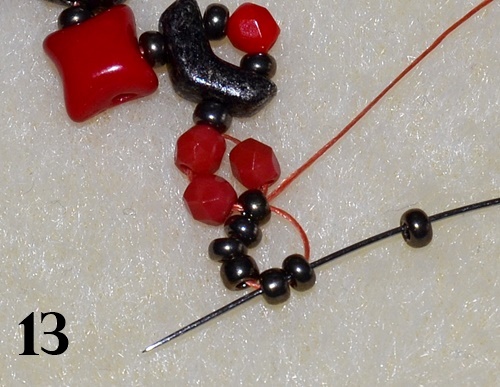
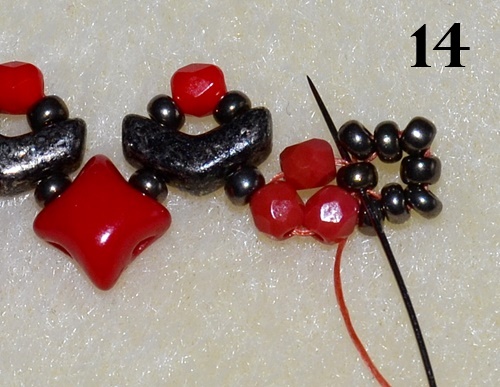
Sew through 1x FPBC (Fig. 15). Sew through the next 1x FPBC (Fig. 16).
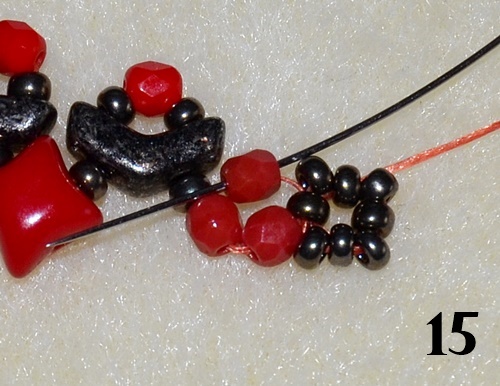
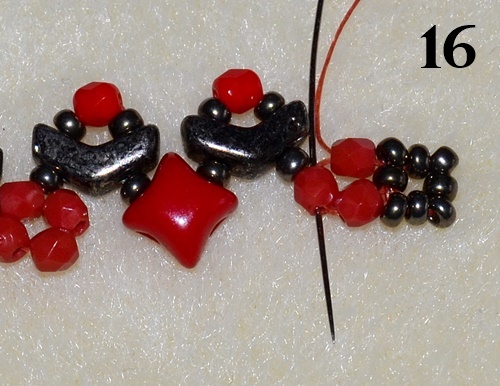
Now sew the opposite part of the bracelet. Pick up 1x P and 1x A through the left hole. Pick up1x P, 1x FPBC, 1x P and sew through the right hole of 1x A. Pick up 1x P and sew through the bottom hole of W (Fig. 17). Pick up 1x P and 1x A through the left hole. Pick up 1x P, 1x FPBO, 1x P and sew through the right hole of 1x A. Pick up 1x P and sew through 1x FPBC (Fig. 18).
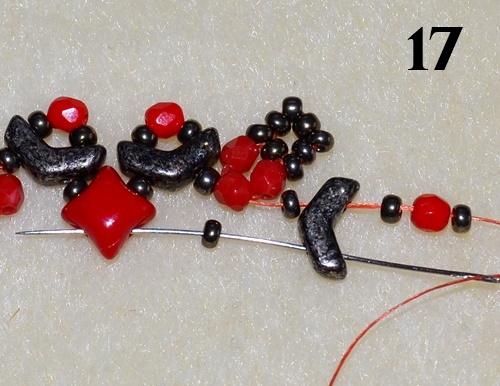
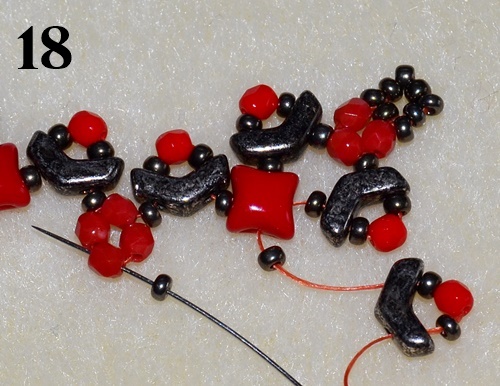
Repeat the procedure according to the figures 17 and 18 until the end of the row. Sew through 1x FPBC following the last 1x P just added (Fig. 19). Sew through 1x P, 1x A and 1x P (Fig. 20).
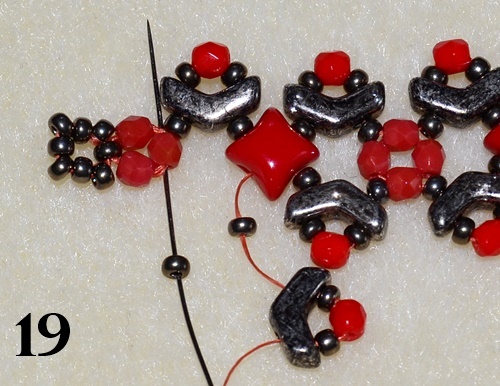

Sew through 1x FPBO (Fig. 21). Pick up 2x P, 1x FPBC, 2x P and sew through 1x FPBO (Fig. 22).
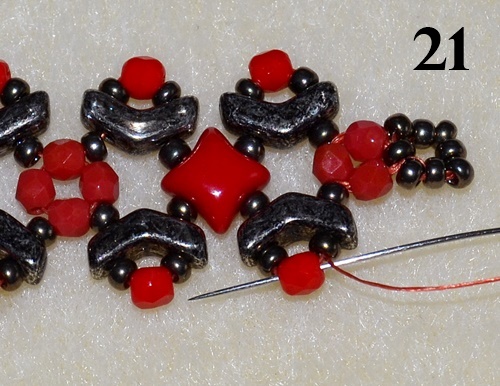
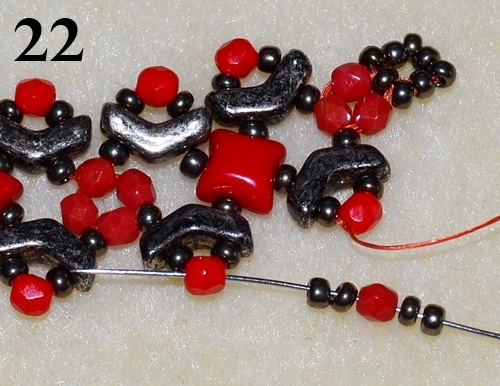
Repeat the procedure according to the figure 22 until the end of the row. Sew through 1x P, 1x A, 1x P, 1x FPBC, 1x P, 1x A, 1x P at the end (Fig. 23). Sew through 1x FPBO. Pick up 2x P, 1x FPBC, 2x P and sew through 1x FPBO (Fig. 24).
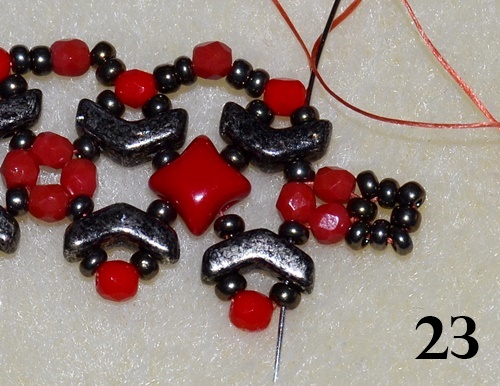
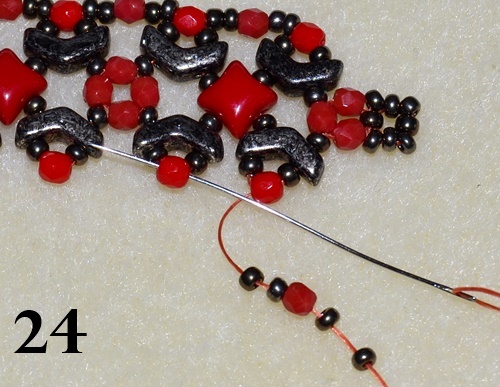
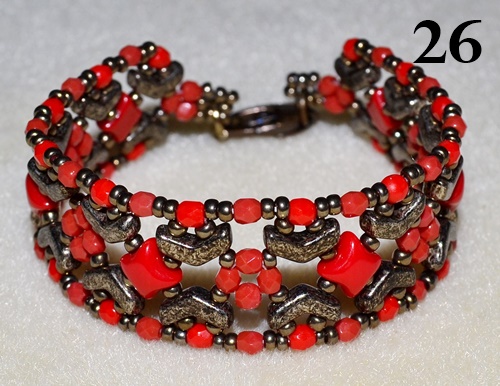
Repeat the procedure according to the figure 24 until the end of the row. You can sew through the circuit last added on both sides for strength. Weave the working thread and end. Your bracelet is completed (Fig. 25)! Add the rings and the clasp into the loops just sewn (Fig. 26).


Enjoy your creation !
Karla Mokrošová