BRACELET THALIA
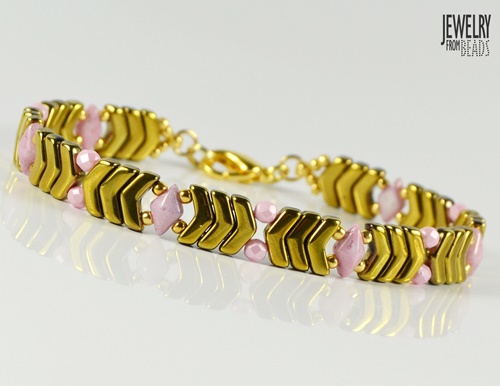

Design by Karla Mokrošová
Cut the thread about 120 cm long. Leave one end of the thread ca. 15-20 cm long for weaving. The bracelet can be sewn in two ways - one needle (see instructions) or two needles.
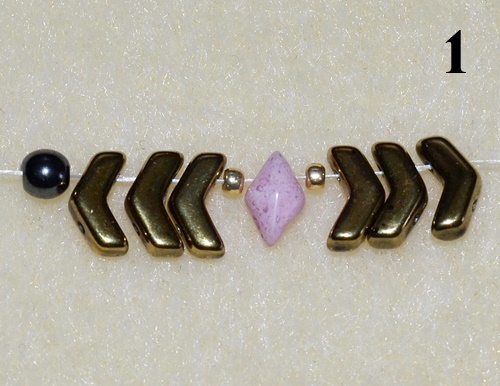
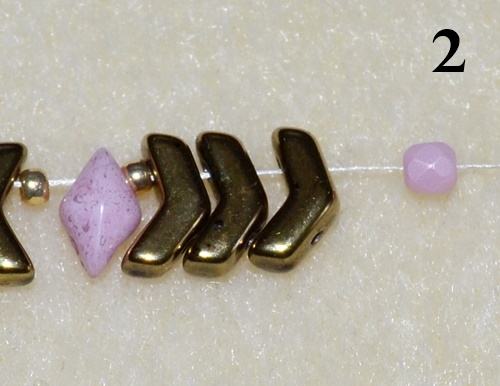
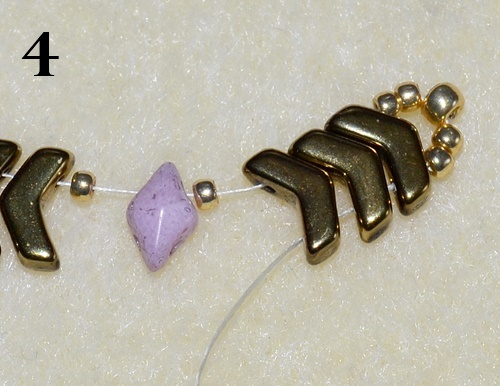
Pick up the „stopper“ bead and 3x A through the top hole pointing down. Pick up 1x P 10/0, 1x D through the top hole, 1x P 10/0 and 3x A through the top of the hole up (Fig. 1). Pick up 1x FPB (Fig. 2).
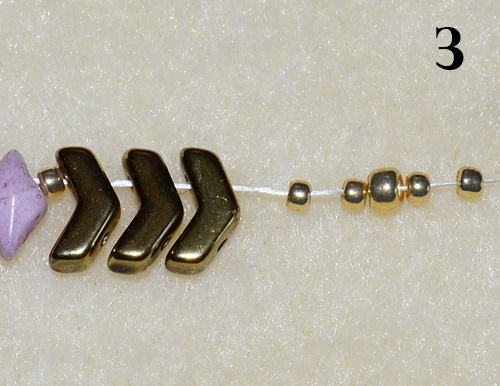
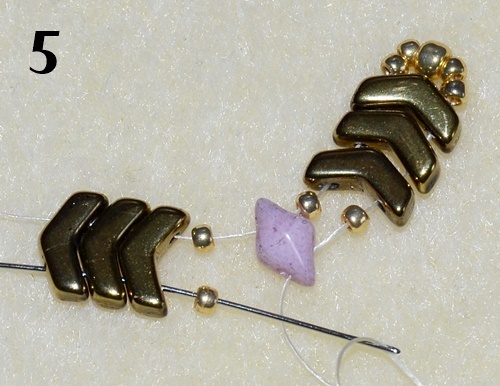
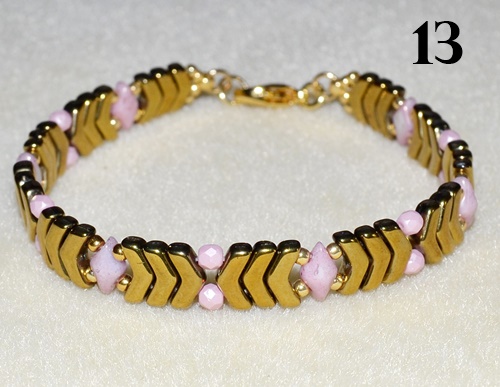
Repeat the procedure according to the figure 1 (except for the „stopper“ bead) and figure 2 until the end of the row. Continue adding 5x D and 4x FPB between A beads – in total 6x D and 5x FPB (Fig. 12). Pick up 2x P 10/0, 1x P 8/0 a 2x P 10/0 following last added A (Fig. 3). Sew through the bottom hole 3x A (Fig. 4).
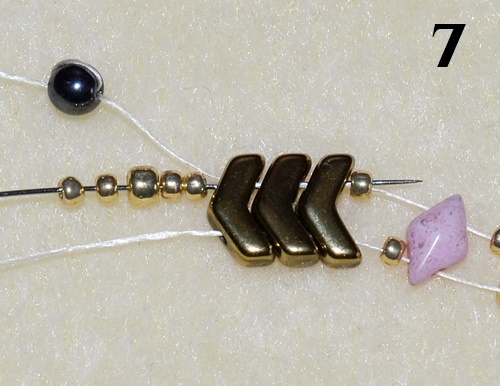
Pick up1x P 10/0, sew through the bottom hole of 1x D, pick up 1x P 10/0 and sew through the bottom hole of 3x A (Fig. 5). Pick up 1x FPB and sew through the bottom hole of 3x A (Fig. 6).

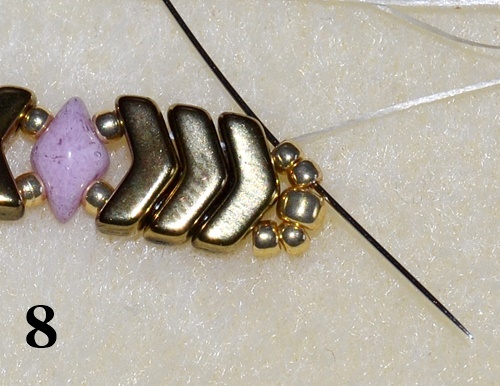
Repeat the procedure according to the figures 5 and 6 until the end of the row. Pick up 2x P 10/0, 1x P 8/0, 2x P 10/0 following last sewn A and sew through the top hole of A (Fig. 7). Remove the „stopper“ bead, weave the short end of the working thread and cut it off. Sew through all the beads in the top row gradually. Sew through 2x P 10/0 at the end (Fig. 8).
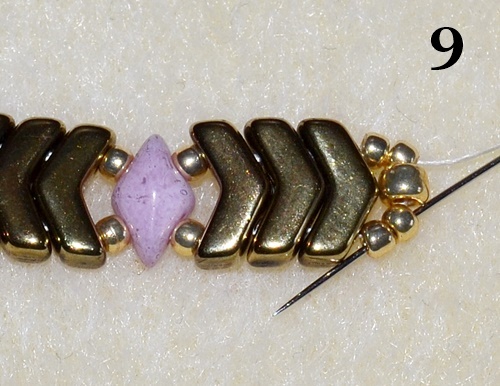
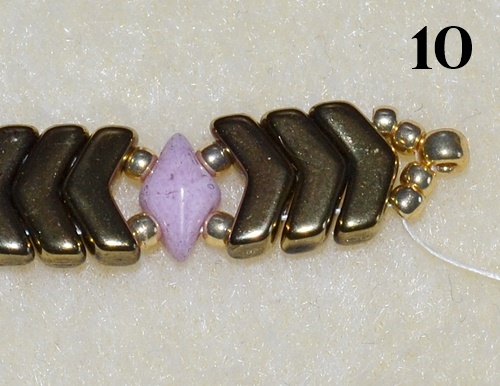
Skip 1x P 8/0 and sew through the next 2x P 10/0 (Fig. 9). Tighten the working thread. P 8/0 comes out beautifully (Fig. 10).
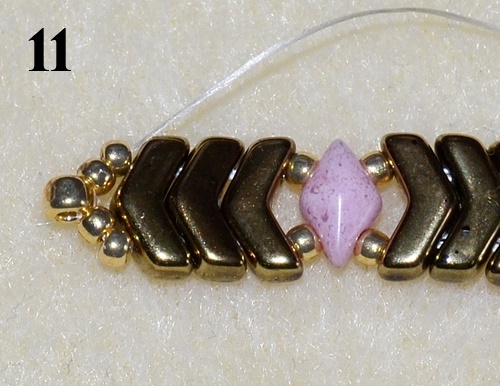
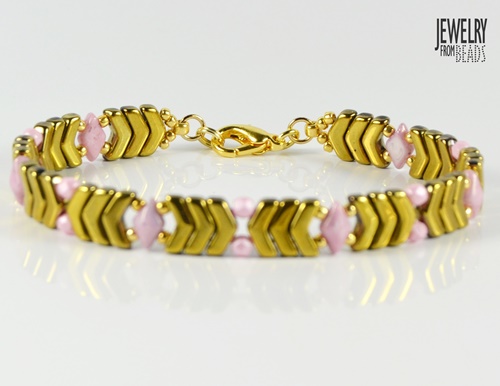
Sew through all the beads in the bottom row. Make a point again at the end according to figures 9 and 10 (Fig. 11). Weave the working thread and end. Your bracelet is completed (Fig. 12).

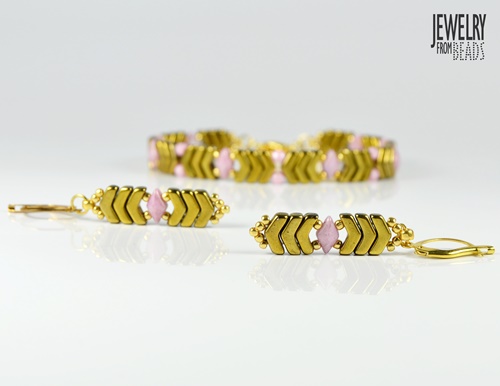
Add the rings and clasp including double split ring into P 8/0 (Fig. 13).
TIP:
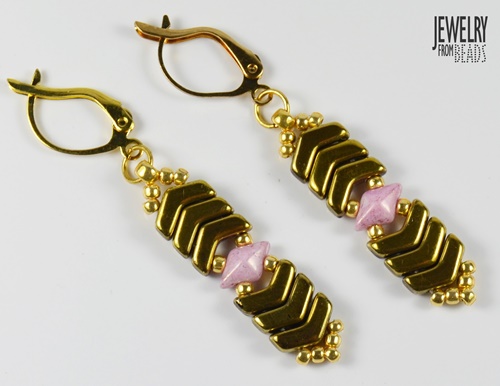
You can sew the earrings in the same simple way. Replace P 8/0 with P 10/0 in the bottom part. The upper part with P 8/0 remains unchanged. Add the ring and earring findings.


 Enjoy your creation!
Karla Mokrošová
www.facebook.com/jewelryfrombeads
email: jewelryfrombeads@email.cz